Welcome back to my blog! If you’re drawing in a realistic style and you want your object sitting on the surface, aka your paper, it’s very essential to get the shadow right. I managed to write down five things that I think are important to keep in mind. So if you wanna learn about them, keep on reading.
1. THE SHADOW TOUCHES THE OBJECT
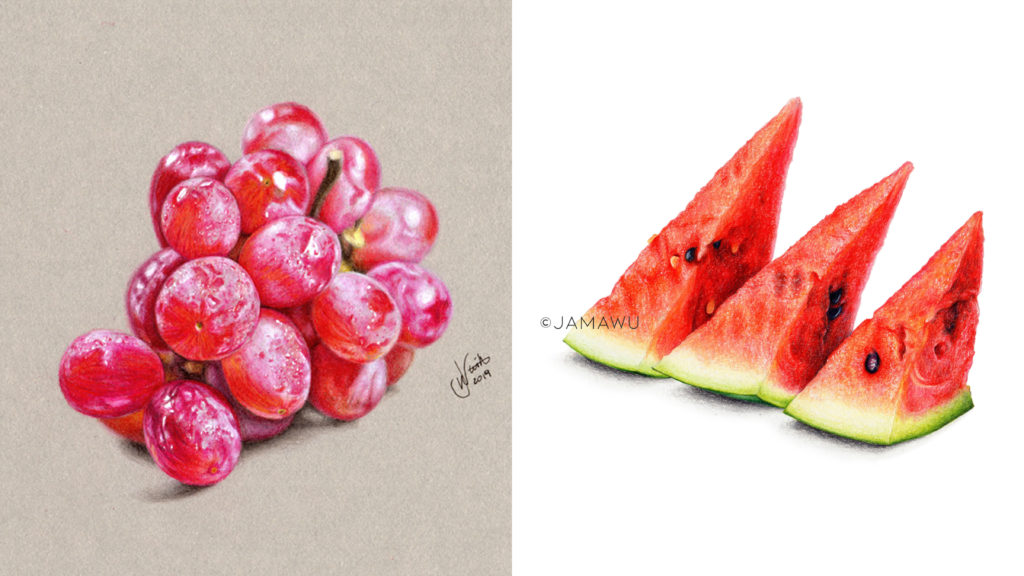
If the object you’re drawing just sits on a flat surface the shadow always touches the object at at least one spot. If your shadow is below the object and not touching it, the object seems to float above.

2. MAKING THE SHADOW UP YOURSELF
If you’re not working with a reference photo or your subject on the photo doesn’t have shadow, it’s not so hard to figure it out yourself. Firstly, usually your subject already has some shadow on itself, so try to fit the shadow on the ground to the one on the object. Otherwise it will look weird if the light on the object comes from the right and the one on the ground comes from the left. This would make your drawing look less realistic as you can tell that something is off, even if you can’t tell what it is.
3. MATCH THE PENCIL COLOUR TO YOUR PAPER
When drawing an object that should seem to sit on the paper, it’s very important that the colour of the shadow works with the colour of the paper. Using the same grey pencils on every different coloured paper won’t work out. For example, if you draw on brown paper and use grey pencils, the shadow gets too obvious and you can’t really blend it in to the paper either. I always try to use colours that work with my paper, cold greys on very white paper, warm greys on slightly yellow paper, brown on brown, etc. A way to figure out which colours to use is to put an object on your actual paper and try to find colours that match the shadow.

Here I used french grey pencils of the Prismacolors for the grey paper and warm grey with the white paper.
4. WORK FROM LIGHTEST GREY TO DARKEST
I always start out with the lightest grey to define the outer edges of the shadow. Define is probably not the right word for that, as it shouldn’t be a defined edge, rather no edge that blends into the paper, but we’ll get to that later.
The lightest grey I use also depends on the paper. If I work on white paper, the lightest grey is, in that case, the actual lightest grey I have. On grey paper, on the other hand, the lightest grey should match the paper, so you can’t really see it, which makes blending easier.
After defining the space where the shadow is, I take the next darker shade and start where the shadow touches the object and blend it out, not going as far out as with the first shade. Continuing this with all the other shades I use. Also, don’t be afraid to make the shadow very dark, especially where it’s touches the object. I never use black when drawing shadow but the very darkest grey I have.
An uneven object doesn’t touch the ground at every spot, which should be visible in the shadow too. (Ex. Colour swatch)
5. TAKE YOUR TIME BLENDING
I get it, drawing the shadow is always the last step I do and I’m always excited to finish the piece and want to get it done as fast as possible. But rushing the shadow is definitely not the right thing to do. Take your time to blend the shadow to achieve smooth edges that seamlessly blend into the paper. Shadows can be softer or sharper, but the edges usually always blend nicely into the paper. An exception would be direct sunlight beaming on the object, but even then, you can take your artistic freedom and blend out the edges to give it a softer look.
That’s it! A few thoughts and hopefully tips on drawing shadow. I hope it helped and you liked it.
Leave me a comment and tell me what you’d be interested in for future blog posts.
Cheers,


Funny, as I was just about to ask you on your Instagram how you go about doing shadows! Glad I checked out your blog! Very helpful! Thank you
Thanks so much! Glad you like it!